Migrating from Media Port to Media Agent
|
ON THIS PAGE Show |
|
|
|
|
If you are using AP Media Port, follow the quick steps below to migrate to the AP Media Agent.
Quick Steps
STEP 1: Sign In to the Agent Configuration Dashboard in AP Newsroom
Go to AP Newsroom, enter your AP Newsroom user name and password and click Sign In.
Click
 at top left and
choose AP Media API from the menu to display
the Agent Configuration Dashboard.
at top left and
choose AP Media API from the menu to display
the Agent Configuration Dashboard.
|
|
|
|
If you do not see the AP Media API option in the AP Newsroom menu, please contact your AP Sales representative for access. |
|
|
|
|
STEP 2 (Optional): Set Up Your On-Demand Queues
|
|
On-Demand delivery provides you with the default queue. If you are planning to use additional queues, follow the instructions in this section. Otherwise, skip to STEP 3. |
|
|
|
You can create up to four On-Demand queues in addition to the default queue. Once a queue is created, it may be renamed or disabled, but it may not be deleted.
On the Agent Configuration Dashboard, scroll down to the On-Demand Queues section.
To add an On-Demand queue, click the plus sign at the top right of this section:

In the Create queue dialog box, enter the queue name and description:
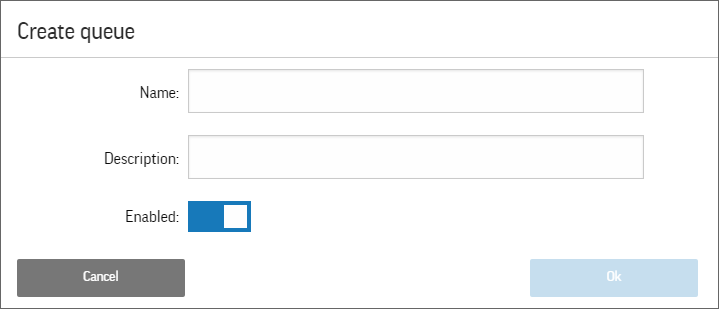
Make sure that the Enabled option is selected.
|
|
|
|
When you create a new queue on the Agent Configuration Dashboard and enable it, the queue appears in AP Newsroom right away. Content sent by AP Newsroom users to On-Demand queues stays there for seven days. If you are not planning to configure your agent soon to process the new queue, it is recommended to disable the queue until you are ready to add it to the content profile and configure your agent to ingest content from the queue. |
|
|
|
|
Click OK.
Repeat steps 2-5 for any new queue that you want to create.
STEP 3: Create a Content Profile
On the Agent Configuration Dashboard, click Create Profile, and then click New Profile.
On the Create Ingest Profile page, type the name of the profile in the Profile Name box.
On the Select Content tab, select the check box next to each On-Demand queue and/or video product/package for which you want to download content.
|
|
|
|
You can only add enabled queues to your content profile. |
|
|
|
|
On the Content Options tab, select the file types and formats for downloading content; for example, you can choose to download NewsML-G2 metadata files and/or specific video renditions.
On the Content Save Options tab, select <OriginalFileName>--<PartialContentID>.<ext> under Content File Naming Format. You can also customize the directory for saving content, folder structure and duplicate settings. Learn more >>
|
|
|
|
Since original filenames are not unique, a partial content ID is appended to the original filename to prevent overwriting files; for example: 5218545_Olympics Usmanov_0_1080i50ESSENCE--64424.mp4. |
|
|
|
|
Click Save at the bottom of the page to save your profile.
STEP 4: Get API Key
You use your user name and password to log in to AP Newsroom and access the Agent Configuration Dashboard; however, you will need an API key to run the agent.
To get your API key:
On the Agent Configuration Dashboard, click See My API Keys (you may need to confirm your password to display your API key).
STEP 5: Download and Register Agent
|
|
Review the system requirements for the agent and configuration dashboard to check if your system is compatible or if you need to upgrade. |
|
|
|
You can configure one or more agents to process your On-Demand queues.
On the dashboard, click Download Agent and save the agent jar file to a folder on your machine.
 Tips
TipsWhen choosing the folder for saving the jar file, consider that this folder will be your <Agent Directory> below which the agent will be saving files by default when you start ingesting content.
It is strongly recommended not to save content in any system folders.
It is not recommended to run the agent from your Desktop.
Renaming the agent jar file is not recommended.
If you are planning to run multiple agents on the same machine, each agent jar file must be in its own folder.
Do one of the following to run the agent:
From a command prompt on Windows or with sudo on Mac or Linux:
Change to the directory where the agent jar file is located; for example, on Windows:
cd LOCATION_OF_AGENTRun the following command:
- From your desktop environment, browse to the folder where you saved the agent jar file and double-click the file name. The Agent Registration page opens in your browser.
java -Xms512M
		 -Xmx1G -jar agent.jar
The Register Agent page opens in
your browser prompting you for an API key.
|
|
Alternatively, you can
provide the API key as an argument from the command prompt: |
|
|
|
To register your agent with the portal, enter your API key in the API Key box and click Register. If registration is successful, you will receive this message: "Success you've verified your API Key".
TipCheck your browser's Address box to determine where the Agent Management page is located on your local machine. For example, if your agent registration address is localhost:8087/register, you can manage your agent from your local machine at localhost:8087/agent.
Click Go to Admin Portal to assign the profile to your agent.
STEP 6: Assign the Profile to the Agent and Start Ingesting Content
On the Manage Ingest Agent page, enter the agent name of your choice in the Agent Name box. The agent name allows you to identify this agent on the dashboard and must be unique.
Select your content profile from the Content Profile list.
Click Save Agent.
Click Start Ingestion to start ingesting content.